We created this custom wig for an interpreter at the Frazier History Museum in Louisville, KY.
This wig is human hair with a hand-knotted top. We’ve created this short set of video tutorials for the classic Regency hairstyle used on this wig, which is based on portraits of Josephine and other period research. Each video is a few seconds long and shows a 360 degree view of the wig to help show each step of the process.
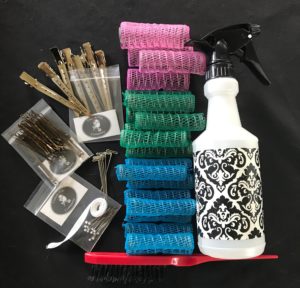
Here’s a few tips for using this basic roller pattern and technique to change the style –
This roller pattern will work on both wigs and one’s own head of hair. We don’t advise using T pins to secure rollers on a human subject, as this is likely to be met with resistance and tears.
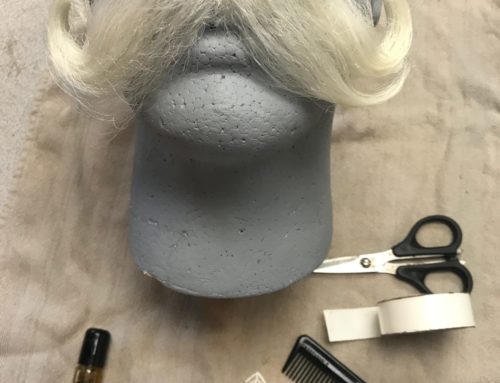
Styling wigs is best done by breaking the whole style in sections. That allows you to easily control and manage each part of the style, and to make changes to the coiffure without needing to take the entire style apart. Below, you’ll see the front section removed from the curlers. When taking hair out of rollers, it’s best to unwrap the hair from the curler rather than yanking the roller free. Unwrapping the hair will keep the curl intact and allow for an easier comb out.
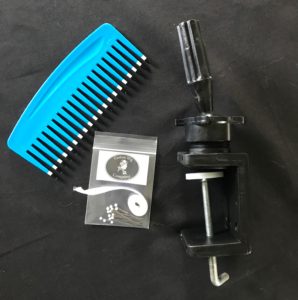
After you remove a section of hair from curlers, use a large, wide toothed comb to gently comb through the section. For a style like this, you want to comb the whole section together, starting a the front roots. Pull the comb through, and repeat until you have achieved the desired level of texture and smoothness. For this style, we combed it through four to five times, and then smoothed the resulting waves into a pleasing shape. More combing would have led to a looser style, less combing to a tighter style.
Once the front part of the style was done, it was time to remove the curlers from the back section.
Take a good look at the pattern of the roller set in video one and you’ll see that the rollers making up the back portion of the style are placed in such a way as to facilitate the hair forming a pretty upsweep. The hair is rolled ‘up’ on each curler, which encourages the hair to go into an updo more easily.
Whenever possible, it’s best to roll the hair in the direction you want the finished style to go. So if you want an updo, set your curlers in such a way that the hair is already conditioned to go up and in. Doing so will make a pretty style and take a lot less coaxing and pinning
Comb the back section out just like the front section, until the hair forms a loose mound of curls. Then gather these curls into a very loose ponytail. If you’ve used the roller pattern we suggest for the back, you’ll find that the hair combs up into the updo very easily. Gathering this section into a ponytail allows the curls to form a pretty heap, which can then be pinned easily to the head. Trying to gather all of the curls up onto the head without putting them into the ponytail means a lot more pins, a lot more work and the pile of curls will be less fluffy and loose. Below you see the curls gathered into the ponytail.
If you want a very smooth, close-t0-the head sweep up to the bun, put the hair into a ponytail, then put rollers into the ponytail hair. That will set curls on the top of the head without adding any volume along the nape area.
And this is how it looks when they are arranged and a few strategic pins are used to hold the curls in place.
It’s time to unroll the final curlers, the ones that are framing the face. Leave these until you are done with everything else because these little curls can easily get caught up and become frizzy or droopy as you work on the rest. Unwrap the curler carefully to preserve the curl and then arrange around the face as you please.
Once the back section is pinned to your liking, unclip the front section, and gently move it into place, arranging it around the updo in the back. Use a few bobby pins to anchor the waves in place. This is the fun part, you can keep playing and arranging until you have the style and silhouette you want. Don’t be afraid to experiment with both sections of hair to see what happens as you comb and arrange. The best way to learn how to style wigs is by getting your hands in it and trying things. If you don’t like how it turns out, you can easily re-roll that section and start again.
And here is the finished style

Tips for using rollers to create a Regency hairstyle
- Larger curlers make larger, looser curls, and when used at the root, create more lift than smaller curlers. Use larger curlers if you want a style that’s more wavy than curly or if you want more volume.
- Smaller curlers make smaller, tighter curls and can be used when you want to create a large number of smaller curls or a more frizzy or poofy style – useful for the face framing fringe of small curls that was also popular in the Regency.
- To have an updo higher on the head, as seen in the later part of the Regency and through the 1830’s, move the pattern for the updo higher up onto the crown, so the bottom-most curler starts just below the crown. To move it lower, drop the pattern so that bottomost curler sits at the nape.
Above all else, experiment and practice! Try different sized curlers, try combing more or less and just keep playing with the hair until you understand all of the ways you can vary a single roller pattern. And remember, a styled wig that looks perfect on the head is just a starting point – be prepared to adjust and arrange once you have the wig on someone.
[…] for the Jane Austen Festival. In the meantime, check out this tutorial for a Regency hairstyle here on our […]
Hi I saw that you were interested in making Victorian wigs, have you made any that look like this, the bun near the nape of the neck with the braids coming up, sort of looping under the ears & then tucking into the bun? You have a picture of Queen Victoria with a similar hairstyle. I put a link, I don’t know if that helps? How much would something like that cost?http://i144.photobucket.com/albums/r163/linschoten/Paintings%202/crlesslieqv.jpg Thanks so much, great site!!!! Wendy
Hi Wendy – We have done wigs in that hairstyle, it’s a pretty look. Very roughly a wig like that, made from scratch and custom fit, would be $600-700 – that’s for human hair. If you have questions or would like further information, just let us know!